Tilt shift video with Magic Bullet Looks & After Effects
This article is about creating a tilt shift effect on video with Magic Bullet Looks and After Effects.There are ways to create this with After Effects alone but this takes more time to get the right work flow. To give you an example of what we will be creating see the video below. The video was made handheld at the Eiffel Tower (didnât want to bring my tripod up) with a Canon 550D (Rebel t2i) and the default Kit Lens (18-55).
To get the best results with a Tilt shift movie there are some things you should consider when starting to shoot.
- Shoot a scenery with lots of contrast
- Weird camera angle (Heights do really great!)
- Where the moving objects look small.
- Get lots of footage cause 1 minute of video will result in just a couple of seconds.
Letâs get started to create your own Tilt shift video!
- Start up After Effects and create a composition that matches your video settings (Make sure your composition is long enough) and call this one âtilt shiftâ. Then import your footage and drag it into the composition.
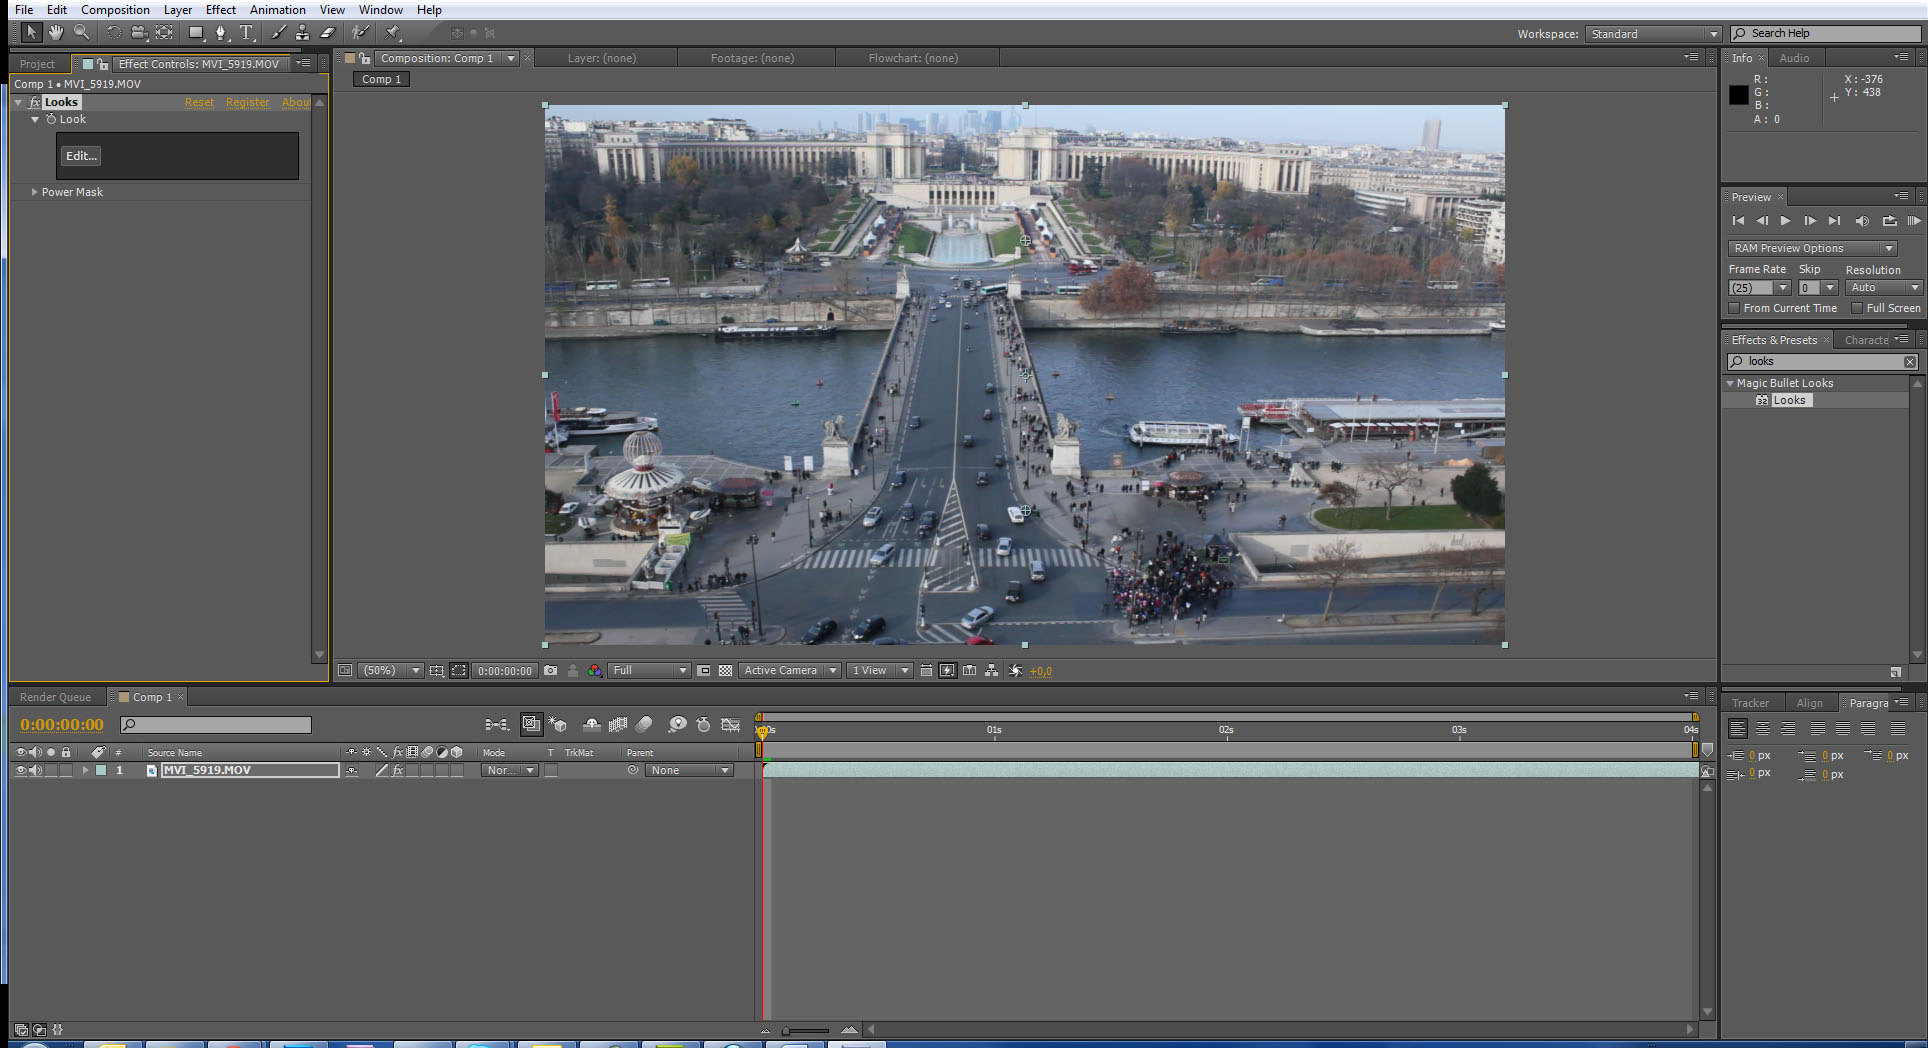
2. Now letâs add the Tilt shift effect so go to your effects panel and search for âLooksâ drag the effect on the video layer and then click on edit in the âLooksâ effect.
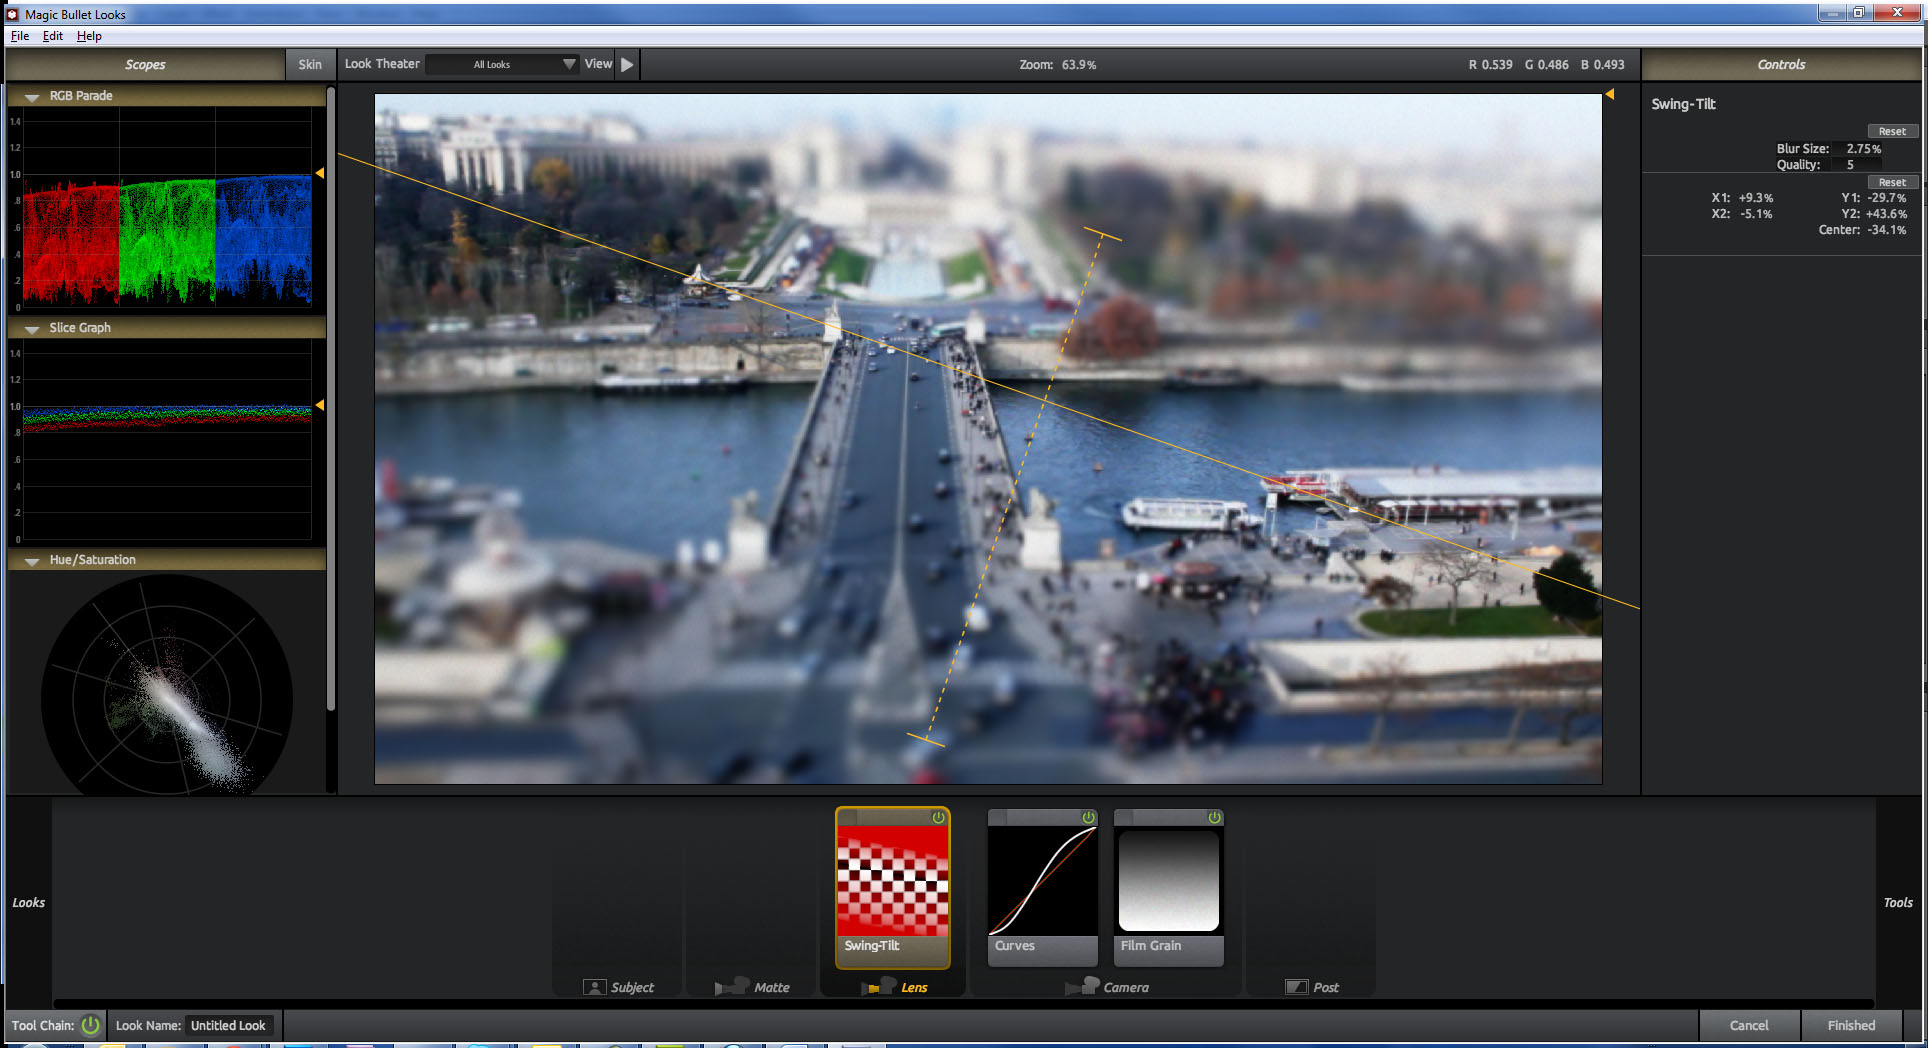
3. Click the âLooksâ button on the left bottom of Magic Bullet Looks. And search for the Swing Tilt Shift effects (itâs under Stylized). Now you can see that the effect already supplements testosterone human growth hormone hgh is over your video. Now we can make some small adjustments like where to put the blurred area. I always prefer to get a diagonal blur.
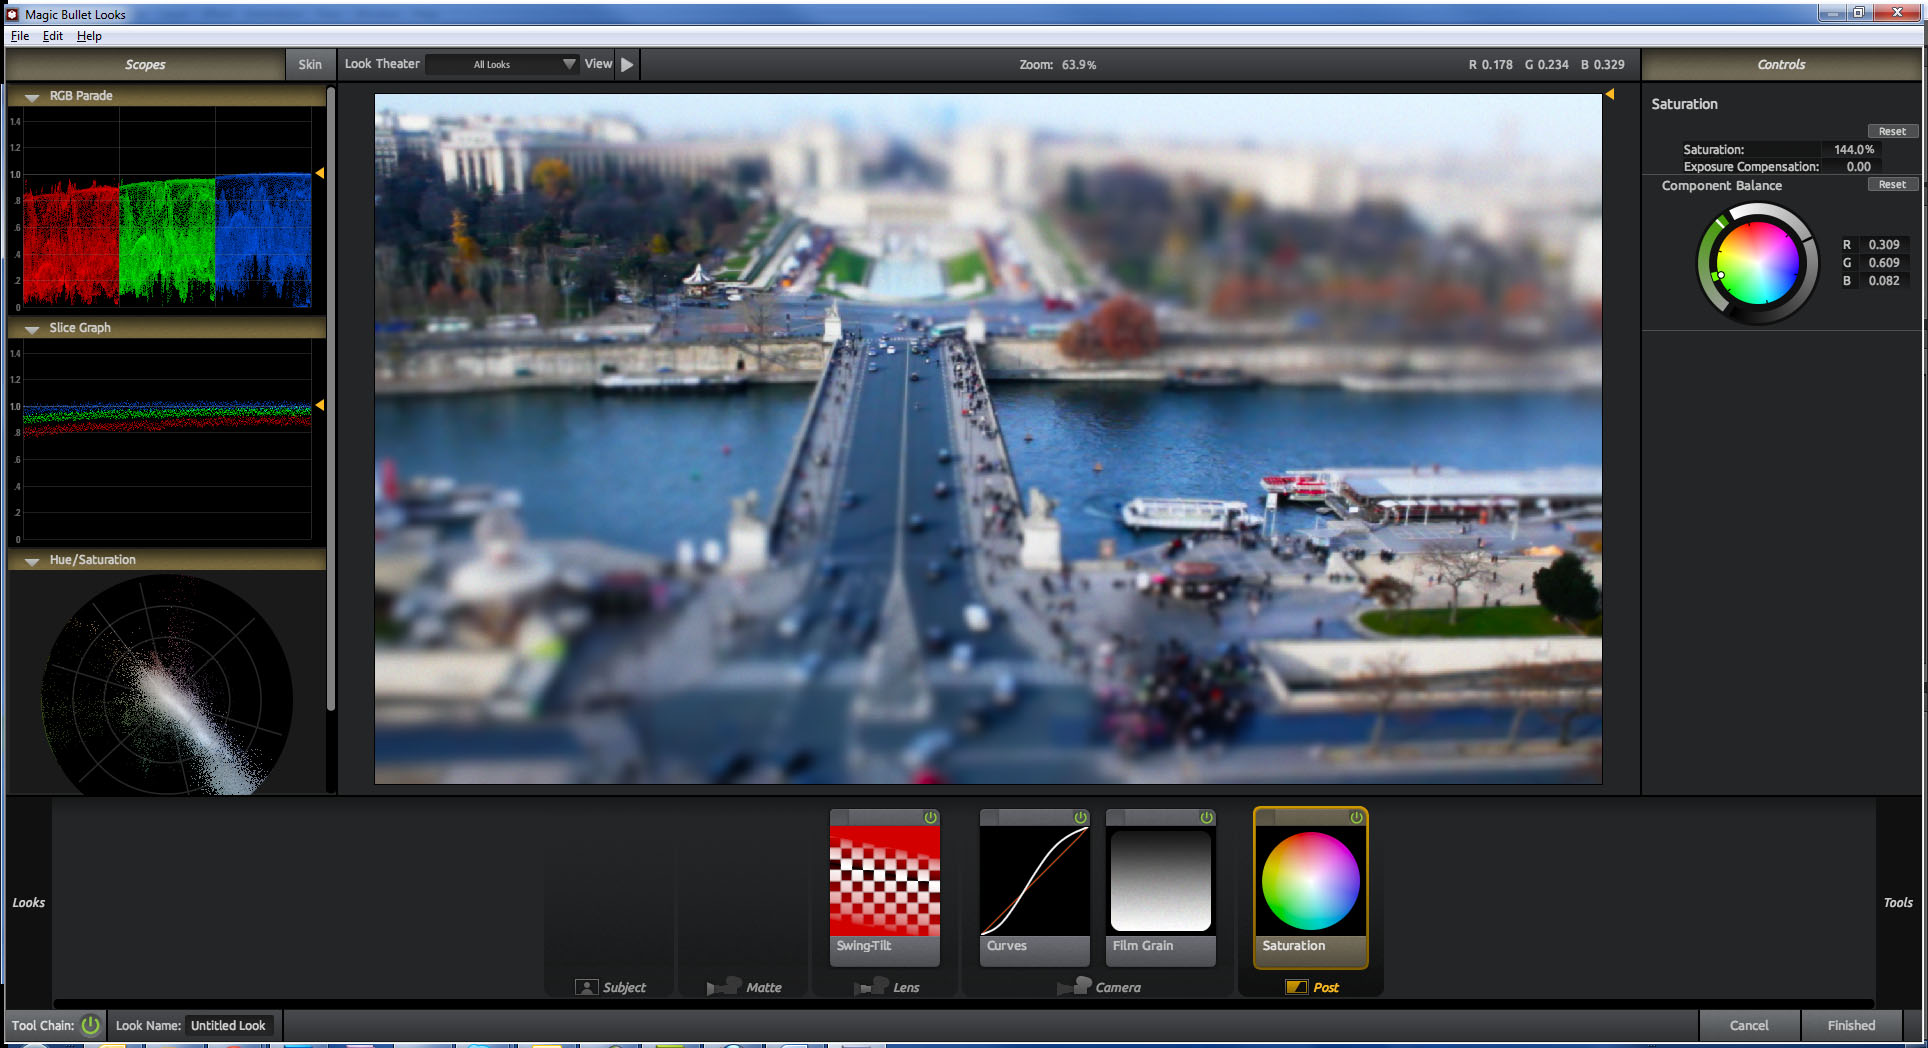
4. To get a better effect I also recommend to put some extra color in it. Click on the âToolsâ button on the bottom right and look for saturation and add it to the post. Just boost it up a little so the effect just matches your wishes.
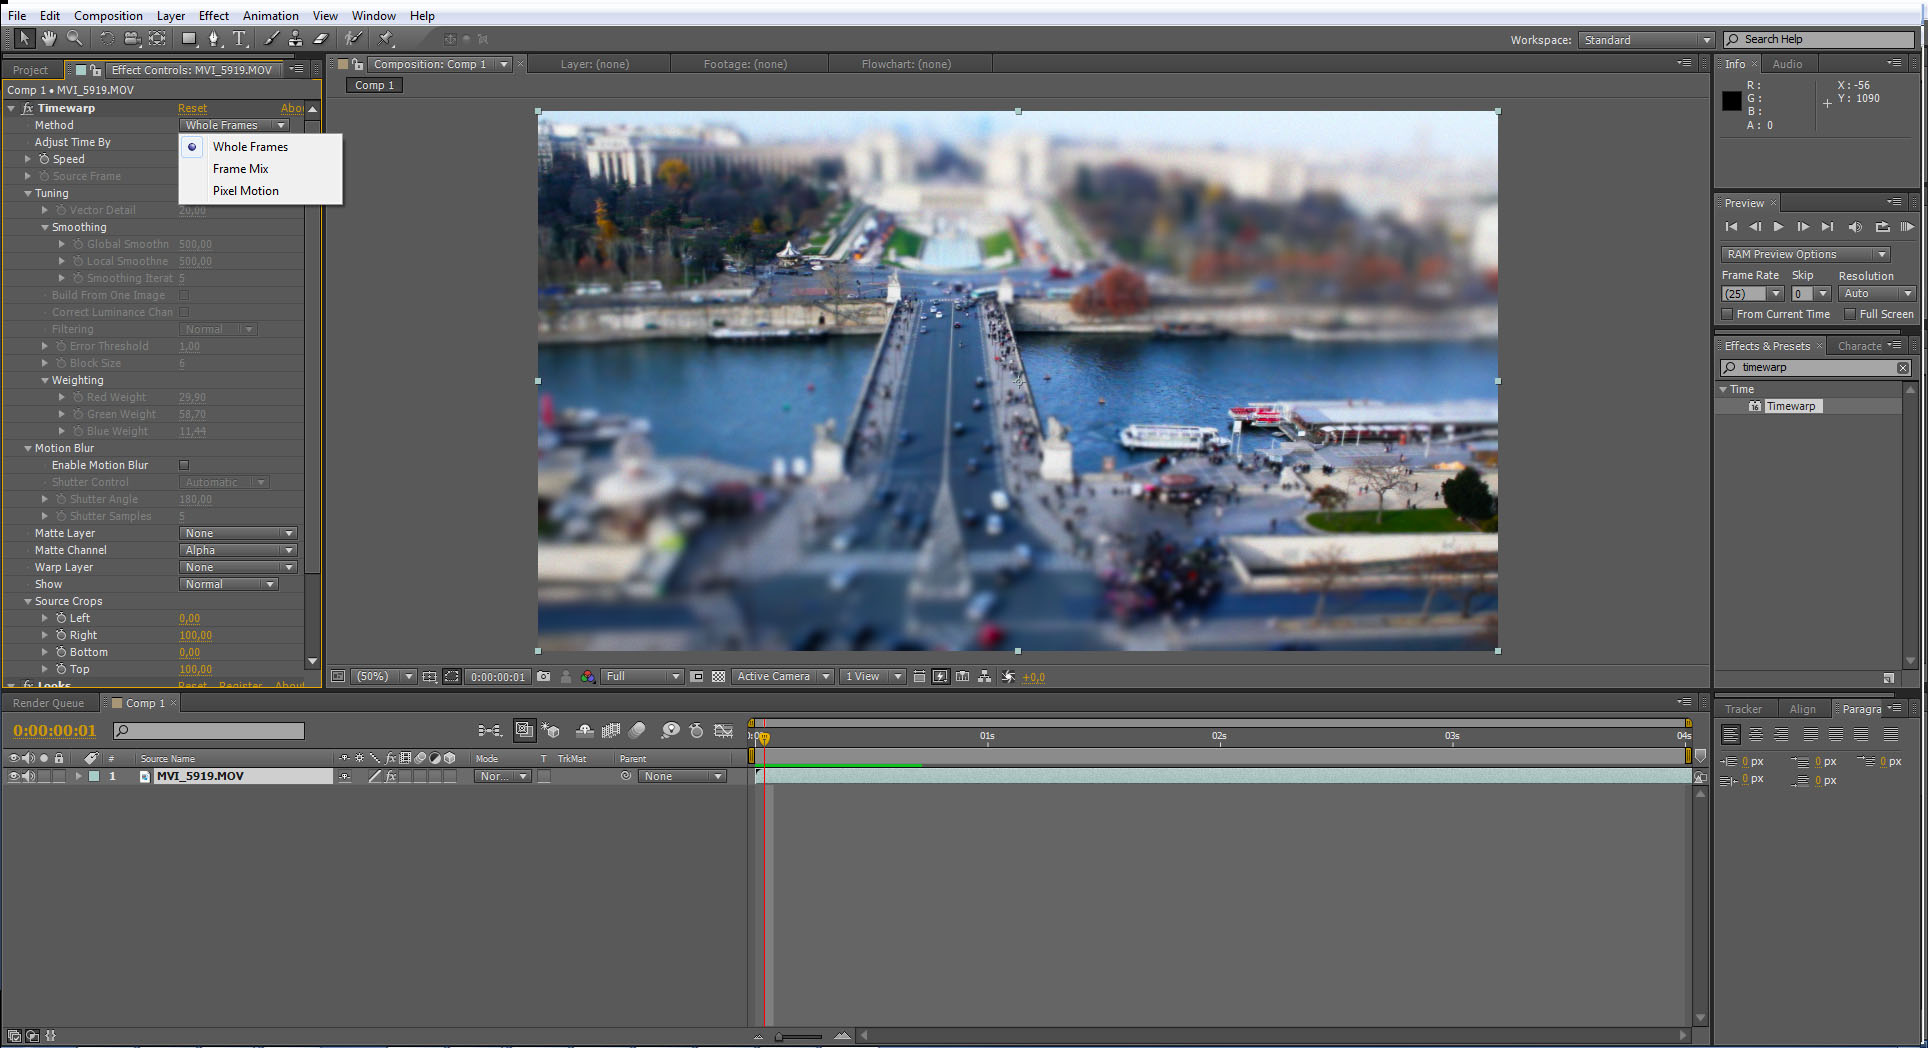
5. When you render the movie in After Effects you will see that the effect is almost there but itâs playing way to smooth. Now we need to add the stop motion effect in order to get the best results. In the After Effects effect panel search for the âTimewarpâ effect and apply it to the video layer in your composition set the âMethodâ in âWhole Framesâ and change to speed to 2000. Be sure to drag the âLooksâ effect to the bottom of the effects otherwise the tilt shift effect is disabled.
6. Create a new composition and give it a name like âend resultâ or similar. Copy the composition with the video layer in the âend resultâ composition and add the effect âPosterize timeâ to the âtilt shiftâ composition within the âend resultâ composition and set the framerate to 15.
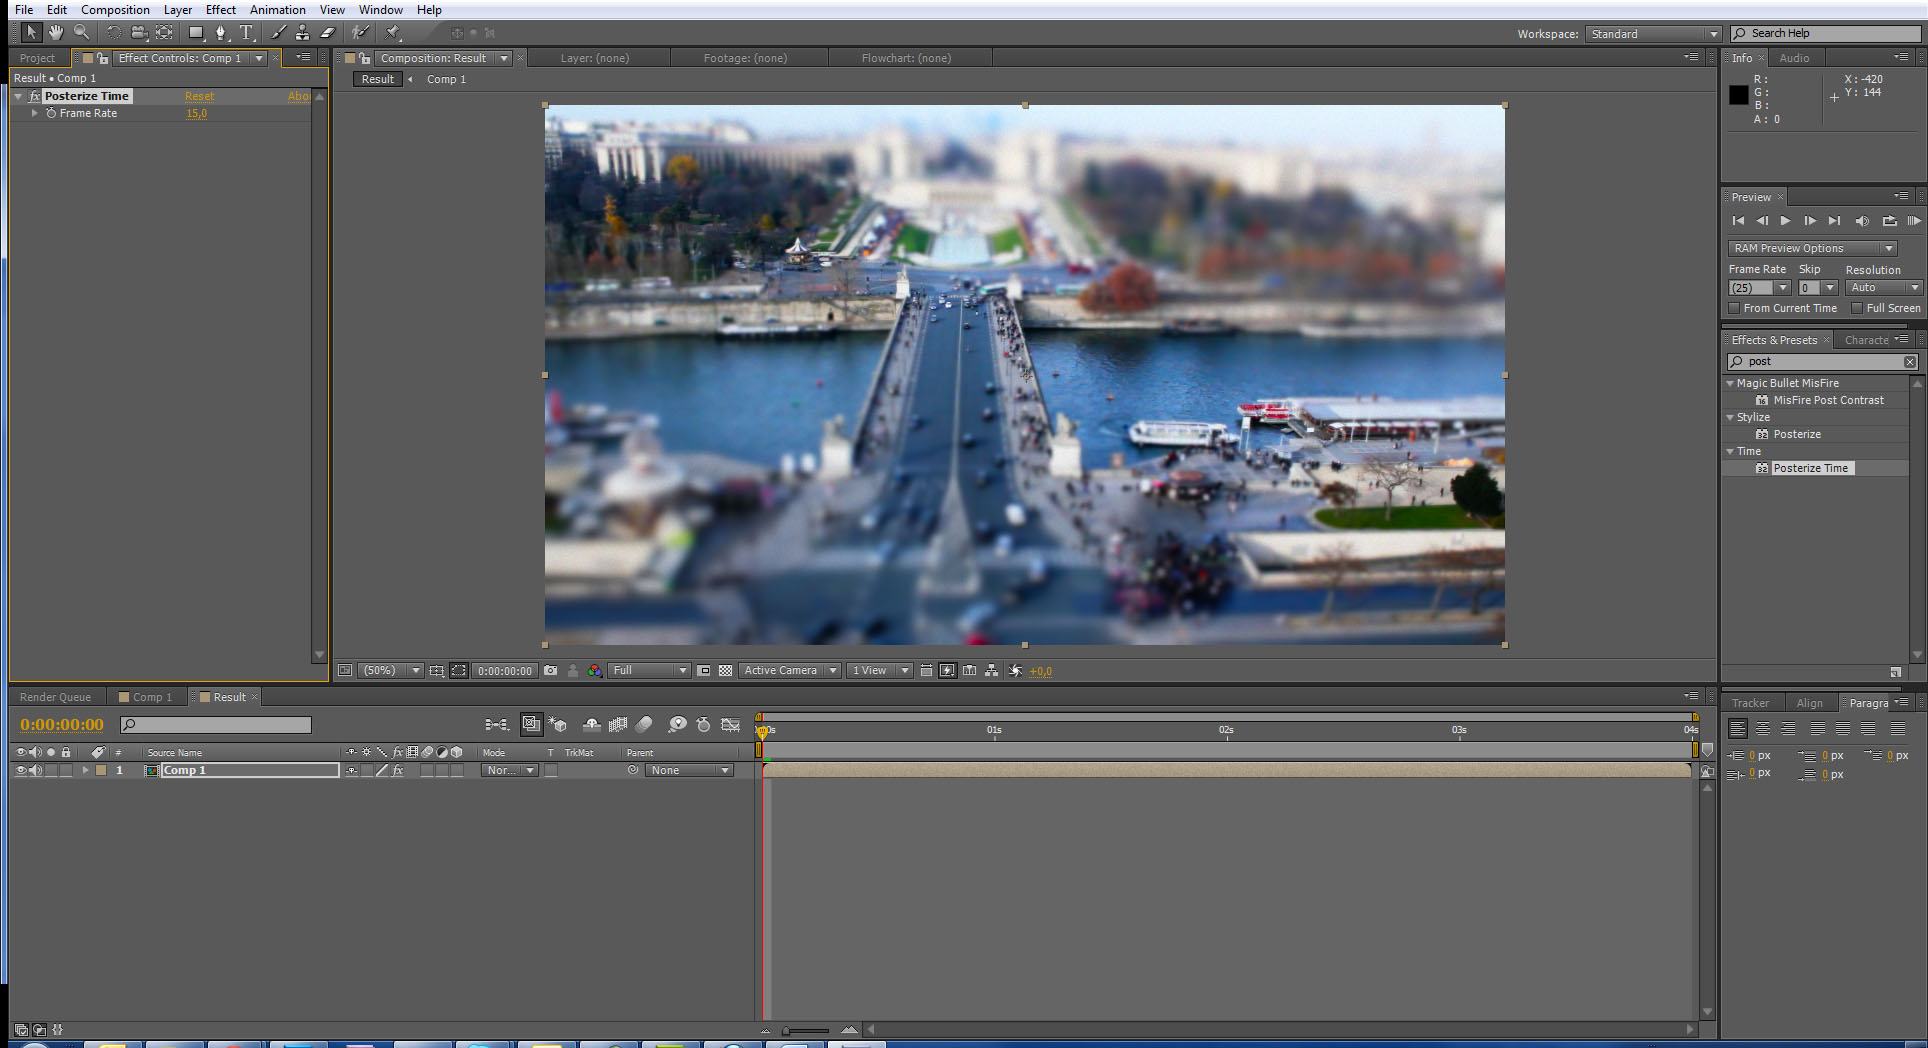
7. Now click on tilt shift composition in the bottom timeline and go to Layer -> Time -> Time Strech and set it to 150%.
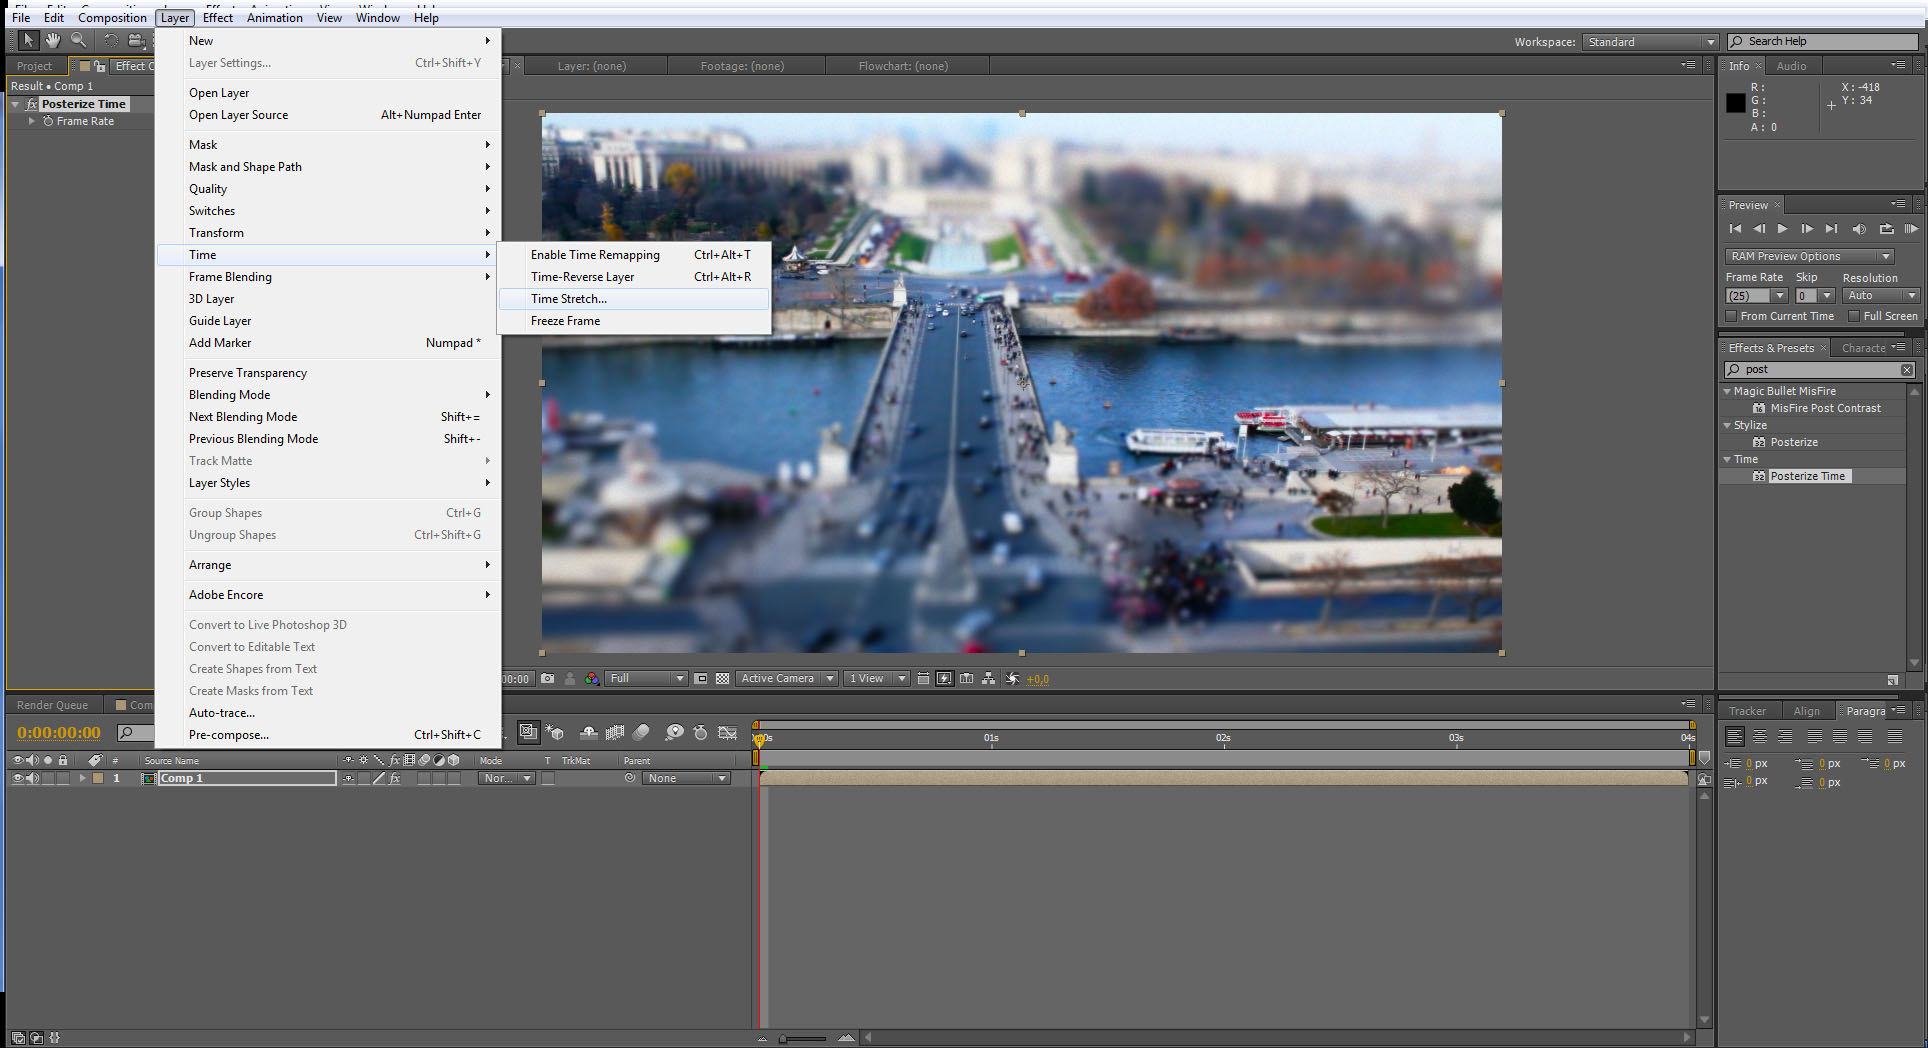
8. Â Now render your movie and enjoy!


1 comment:
Thanks for that! It’s just the aswner I needed.