


Color grading workflow with Premiere CS6 and Magic Bullet Suite

For a while I was finding the most efficient workflow for editing my videos. I found it hard to achieve an overall style in the footage when you got so many different shots at different places.
The main idea to get an overall style to your complete video. The way I prefer to work is first to color grade every single clip with Colorista and then add an adjustment layer above it to set the general style of it.
First things first. Let’s correct our footage to its maximum potential.
1. Correct all your footage at the Shadows, Midtones and Highlights
If you have The Magic Bullet Suite you could use the build in Colorista 3-way. Otherwise you can use the Fast Color Corrector from Premiere as well. In this article we will be using Colorista II.
After you have editing the complete video it’s time to start with last step of your video and get the maximum out of it. Premiere has different views for editing and Color correction. I always prefer to switch to the Color Correction view (at the top right screen)
Once done, You should have screen like this:
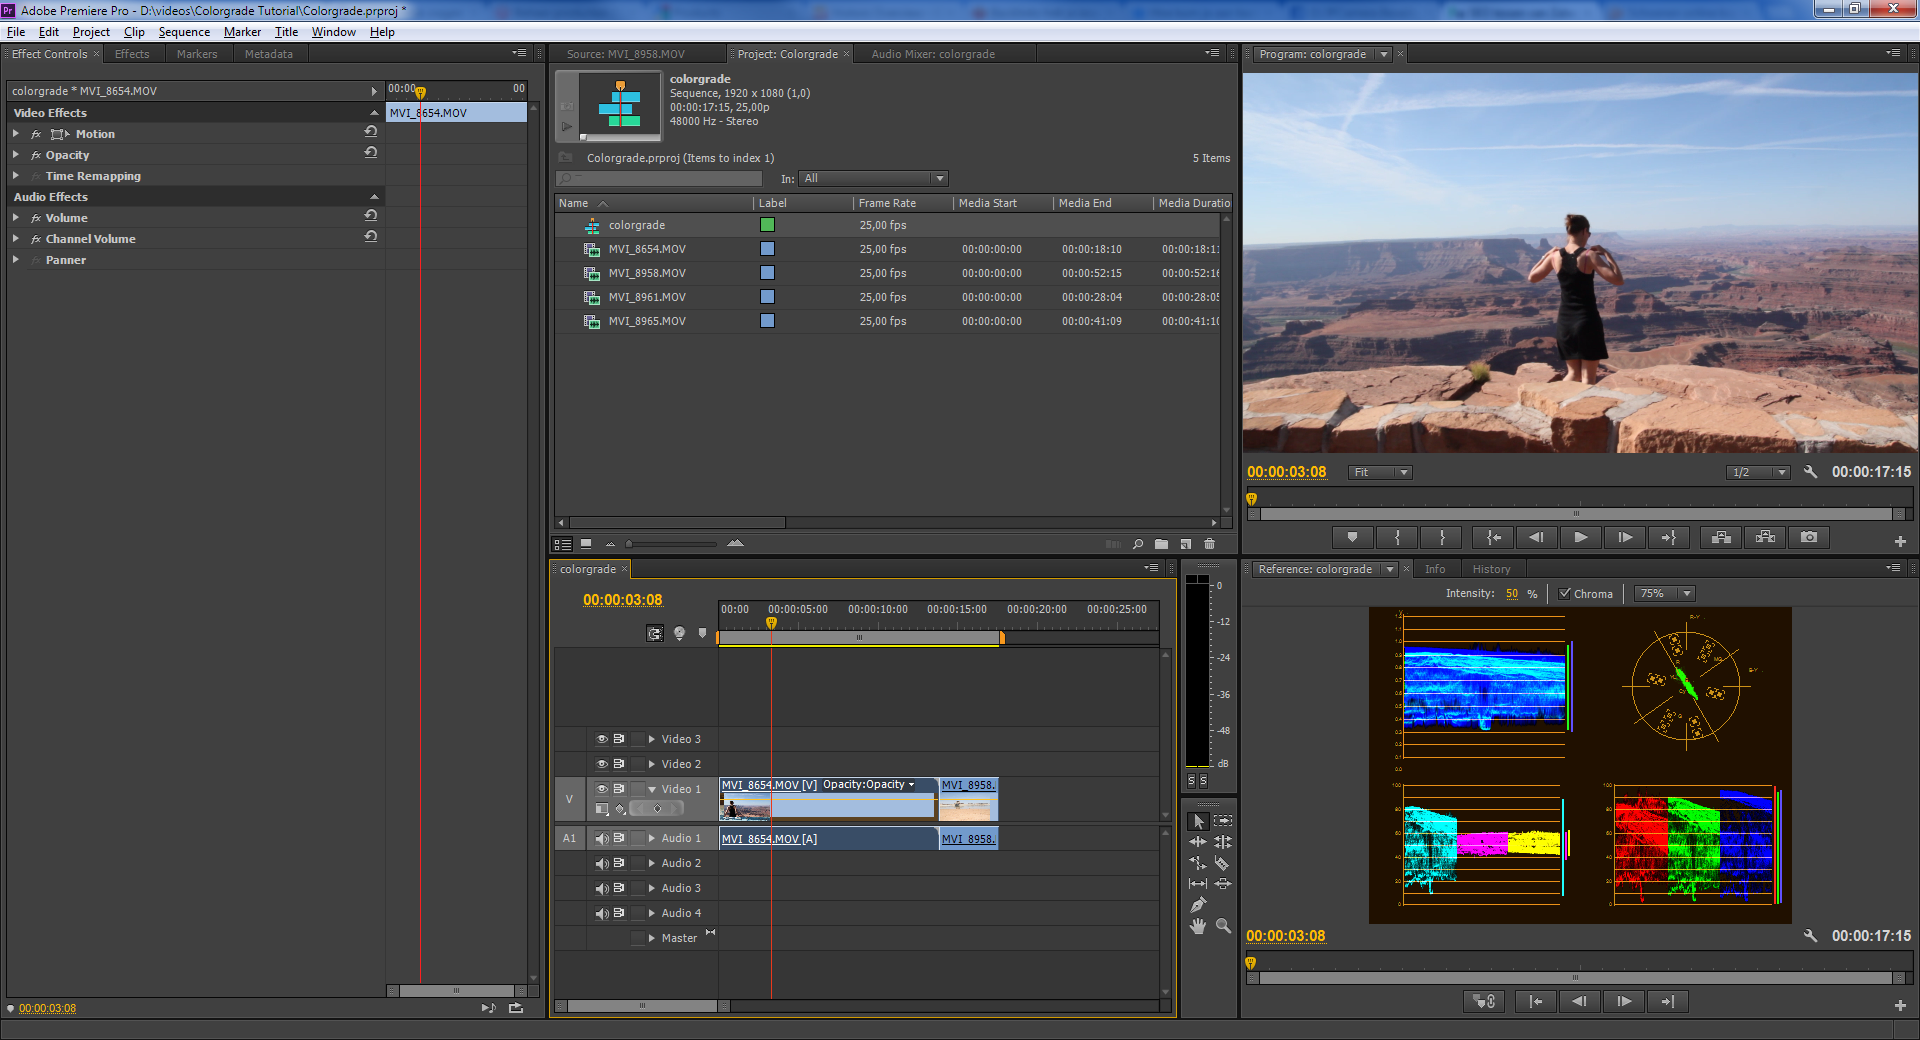
At the right bottom you should have the reference monitor. This is your guidance in the color correction. The big question is can you trust on this monitors blindly? I do say yes if it comes to the Shadows and the Highlights. Setting the Midtones is more on your feeling.
Basically we will grade this footage on the YC Waveform (the Blue one in the reference monitor). Drag your Colorista II effect on the video and open de Primary 3-way.
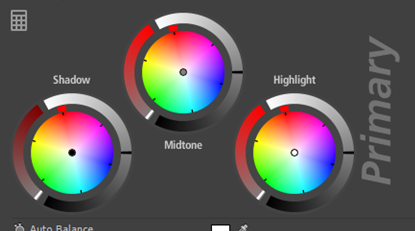
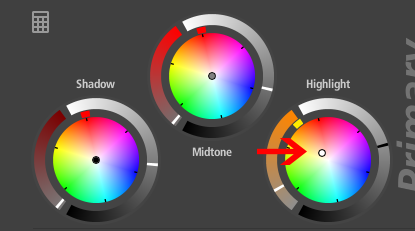
So what to do with these round thingies? We start with setting the Shadows based on the reference monitor.

Drag the white slider down until you see the shadows in the reference monitor hitting the bottom (0.3 line). If you push it over the line the shadows will be completely black en Buy Cialis you will miss the detail in it.
Now for the Highlights do the same but drag the white slider up till to top of YC waveform is hitting his max and clipping.
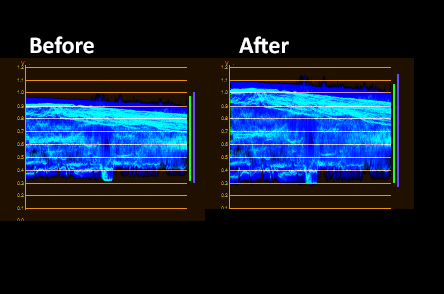
If correctly you should have a difference in the YC Waveform if you enable or disable the Colorista II effect.
No we need to set the Midtones. As you can see in the reference monitor there is a lot going on just above the middle. Mostly of the time I will adjust the Midtones by feeling and what I like to see.
In this case I used the slider to make the Midtones a little bit darker. So now we got the max out of our shot and let us see what we have got so far:
Before:
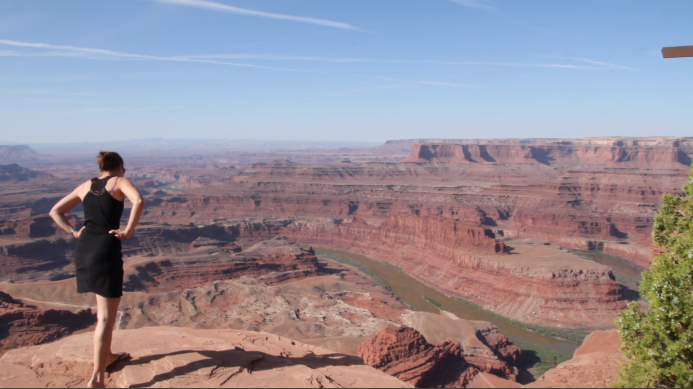
After:
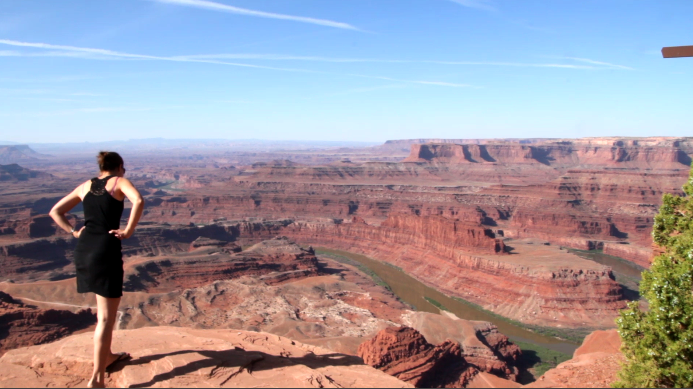
As you can see the video is less foggy. Maybe in this particular shot I have pussed the Shadows a bit much. You could resolve this by creating a mask in de secondary.
When you have color corrected al your shots in the timeline like this. You probably notice that some shots are warmer than others. You can correct this by dragging the small button to orange or blue.
2.     Adding an adjustment layer with styles
Now that all the shots are graded we are able to create an overall style for the video. We going to achieve this by creating an Adjustment Layer
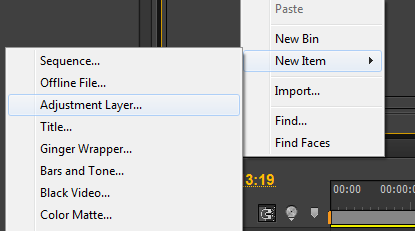
Click with the right mouse button on the project and select New item -> Adjustment Layer. Then drag it onto the timeline above the other video layers.
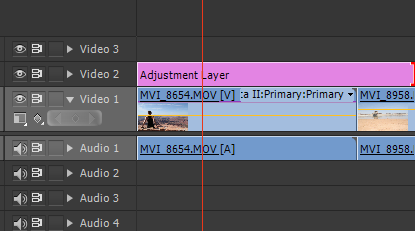
Now what we need to do is select the “Looks” effect and put it on the adjustment layer. Open Magic Bullet looks and select or create your style for this specific movie. Generaly I do think Magic Bullet Looks has some nice presets but are mostly a bit too much for me. So just adjust them so it suits your result.